How to Create Bookmarks for GotPrint in Adobe Photoshop

Do you want to create bookmarks for your new upcoming book release and have no idea how to start? Perhaps you do not have enough money to hire a graphic designer and you would like to learn the skills to create your own bookmarks? In our Video How to Create Bookmarks for GotPrint in Adobe Photoshop we walk you through the entire process so that it is formatted correctly to place your order at GotPrint.com.
If you do not already have Adobe Photoshop installed on your computer Click Here to download a free trial.
Step 1.
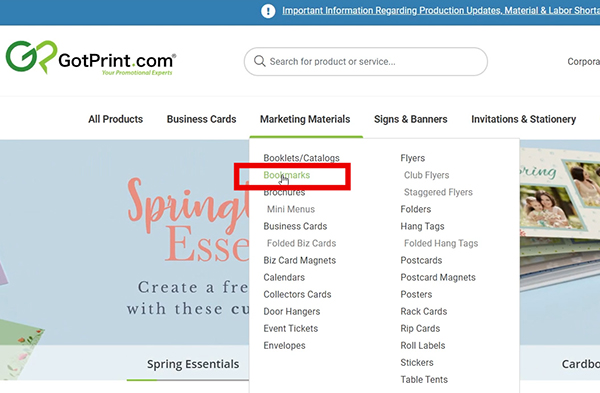
First, you will go to GotPrint.com, and on the home page scroll over to Marketing Materials. Under Marketing Materials click on Bookmarks.
Step 2.
On the Shop by Size page select the size bookmark that you would like for your design.

Step 3.
On the Bookmark page, you will want to scroll all the way to the bottom. Next, you will click on the Templates Tab. At the bottom of the Templates tab, there is a down arrow with More Templates. Click on More Templates to view all sizes.

Step 4.
Next, you will want to select the type of template in the size bookmark you wish to download. In our video tutorial, we downloaded the 2"x 8" European Bookmark template for Adobe Photoshop. They have templates available for Adobe Illustrator, Adobe Photoshop, Adobe Acrobat, Adobe Indesign, and JPG.

Step 5.
Open your downloaded Zip File and extract the contents. After getting your template you will want to click on your Adobe Photoshop Icon to boot up the program.
If you do not already have Adobe Photoshop downloaded on your computer, you can Click Here to download a free trial.
Once Adobe Photoshop is opened you can click and drag your template into photoshop or click File, select Open and from there you can select your downloaded template.

Step 6.
In Adobe Photoshop, in your Layers panel, you will want to duplicate your template layer. To duplicate your template layer you can select the layer you wish to duplicate and click Ctrl + J or you can drag your template layer and hover over the plus icon by the trashcan icon and let go. This will create a new layer and you can drag that new layer to the top of your layers panel and change the opacity to make the layer see-through.
Step 7.
Now that you have the template in Adobe Photoshop, it is time to start designing. One of the first steps is to drag a background image into your file. To resize the image how you like, hit Ctrl+T to open the Free Transform tool. You can drag and resize your book cover into the bookmark and any other graphics you may wish to include. Keep all layers under the template layer with the opacity so you can make sure that you keep important items such as your book cover fully within the safe zones.

Step 8.
Zones of the bookmark
The Safe Zone is anything within the blue outline. This is where all the critical components of your bookmark should be kept. The book cover, all text, and logos should be within the blue safe zone so they do not accidentally get cut off.
The Trim zone is anything past the pink outline. In this Trim zone, you will want your background image and other background elements to extend past this pink trim line.
The Bleed zone is the black line on the outer edge of the bookmark. You will want your background to fully extend past this, that way you are positive your graphic will have full color to the edge of your bookmark.

Step 8.
To add text to your bookmark you will want to click on the T icon for text on the left side of your toolbar. After clicking on the Text tool you will want to click somewhere within your bookmark and draw a box. This will be the text box that you can adjust and tweak. To control the size of your font you can change your size, spacing, and other type details with the character box. If you do not see the character box in your photoshop tools click on the top of the screen Window, scroll down till you see the words Character, and click to add the little checkmark toggle. You should now have the character panel open where you can control your type.

To see a more detailed version of creating a bookmark for GotPrint, Click to Watch our video tutorial on How to Create Bookmarks for GotPrint in Adobe Photoshop.
Useful Photoshop Shortcut Command Keys Used in This Tutorial
Ctrl + T (Free Transform) — This command opens the free transform tool so that you can resize, rotate, or skew your image. This tool shows a draggable outline around your graphic that you can tweak.
Ctrl + J (New Layer Via Copy) — This command duplicates the layer you have selected into a new layer.
Ctrl + Shift + S (Save As) — This command opens the save as box so you can name and save your file.
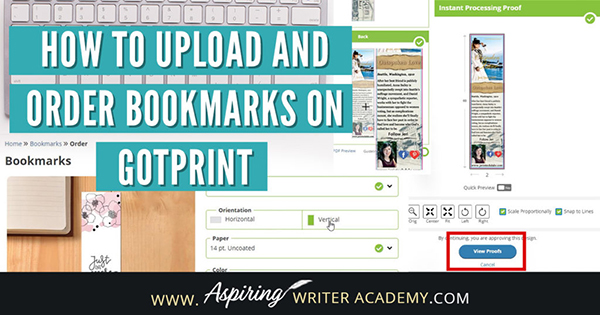
After you have created your bookmark you will want to check out our blog post How to Upload and Order Bookmarks on GotPrint. In this blog post, we will discuss what are the best settings to choose when uploading your bookmark so you get the best quality possible.
I hope that this step-by-step tutorial How to Create Bookmarks for GotPrint in Adobe Photoshop helps you quickly and confidently create beautiful bookmarks for your next book signing, book launch, or writers' conference. If you are looking on how to upload your bookmarks for GotPrint to have the best quality settings check out our blog post How to Upload and Order Bookmarks on GotPrint.
Do you find it difficult to create compelling antagonists and villains for your stories? Do your villains feel cartoonish and unbelievable? Do they lack motivation or a specific game plan? Discover the secrets to crafting villains that will stick with your readers long after they finish your story, with our How to Create Antagonists & Villains Workbook.
This 32-page instructional workbook is packed with valuable fill-in-the-blank templates and practical advice to help you create memorable and effective antagonists and villains. Whether you're a seasoned writer or just starting out, this workbook will take your writing to the next level.
If you have any questions or would like to leave a comment below, we would love to hear from you!
Our Goal for Aspiring Writer Academy is to help people learn how to write quality fiction, teach them to publish and promote their work, and to give them the necessary tools to pursue a writing career.
ENTER YOUR EMAIL
TO GET YOUR FREE
"First Steps Guide for Aspiring Writers" a 30-page comprehensive resource to get you started on your writing journey.
Other Blog Posts You May Like
How to Write Act I: Opening Scenes for Your Fictional Story
Learn to Plot Fiction Writing Series: Story Analysis of “Beauty and the Beast”
How to Plot Your Fictional Novel (with Free Template Included)
The Ultimate Book Signing Checklist: What to Bring to Your First Book Signing
5 Questions to Create Believable Villains
Why Your Characters Need Story-Worthy Goals
3 Levels of Goal Setting for Fiction Writers
Fiction Writing: How to Write a Back Cover Blurb that Sells
Fiction Writing: How to Name Your Cast of Characters
How to Captivate Your Readers with Scene-Ending Hooks
Scene & Sequel: The Secret to Plotting an Epic Novel
Scene & Sequel: The Secret to Plotting an Epic Novel (Part 2)
Writing Fiction: How to Develop Your Story Premise
12 Quick Tips to Write Dazzling Dialogue
10 Questions to Ask When Creating Characters for Your Story
Macro Edits: Looking at Your Story as a Whole
Basic Story Structure: How to Plot in 6 Steps
Samantha Panzera is an adventurous travel blogger, graphic designer, and multi-media business entrepreneur who uses the experience she’s gained over the years to teach aspiring writers the skills they need to build an author platform and take their careers to the next level.


